Good garage bike storage is not simply the rack that puts a bicycle highest on the wall. It is the setup that a rider can use every time without moving the car, lifting more than they can control, or untangling several other bikes first.
Start with the people and the bikes, then choose the storage method. A daily commuter, a child’s bike, a heavy e-bike, and a seasonal road bike may need four different positions even when they share one garage wall.
Short answer
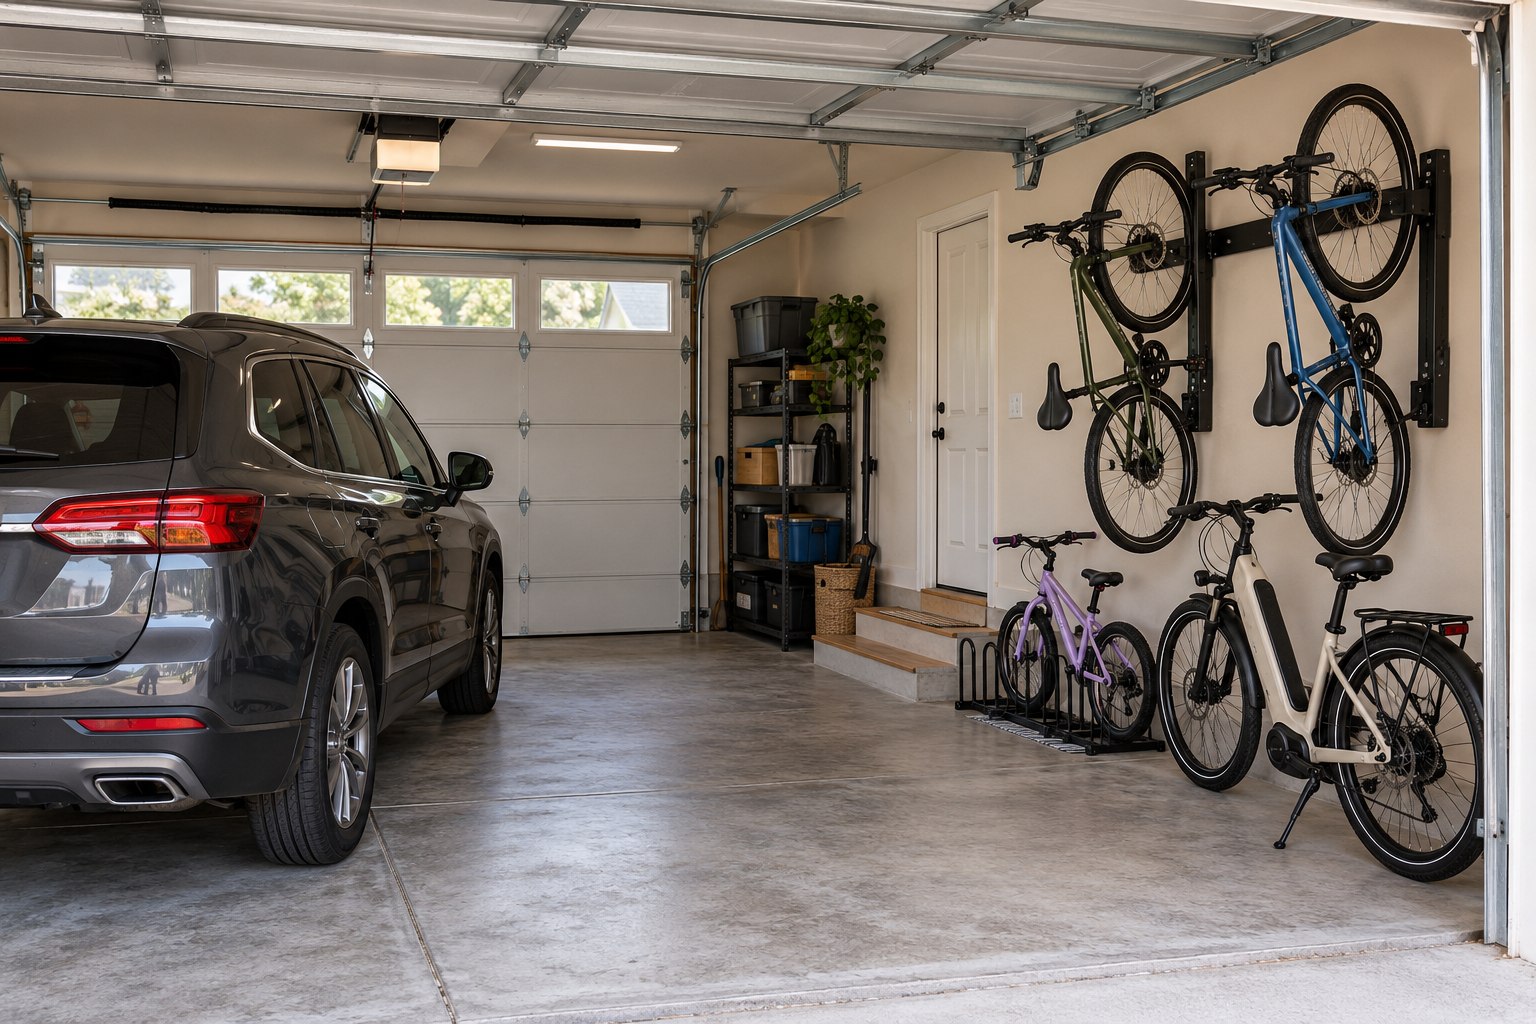
Choose the lowest-effort storage method that still protects the garage floor, vehicle, doors, and walking path. Floor racks are easiest to use. Vertical wall racks save wall width but require raising a wheel and leave the handlebars projecting into the room. Horizontal racks use more wall width but may keep the bicycle lower. Ceiling systems clear both the wall and floor, but they add the most lifting, installation, and retrieval complexity.
Before buying, check five things: who will put the bike away, the complete weight of the bike, the wheel and frame contact points, the mounting or stability requirements, and the full path used to retrieve it. Treat every capacity and compatibility claim as specific to the exact rack model.
Start with the rider and retrieval routine
A storage system succeeds only when people use it. Begin by listing each bicycle and how often it leaves the garage.
- Daily or several times a week: favor roll-in or low-lift positions with independent access.
- Weekend use: a moderate lift may be reasonable if nothing else must be moved first.
- Seasonal use: a higher or less convenient position may be acceptable when retrieval is infrequent.
- Children’s bikes: use a stable position a child can reach without standing below another bicycle.
- Heavy bikes and e-bikes: favor ground-level or roll-in storage unless the user and exact rack can safely manage the full weight.
Also decide who returns wet or muddy bikes. A rack that is easy to use while the garage is empty may be awkward after a ride, when the car is parked and helmets, locks, or bags are still attached.
Measure the occupied garage and the complete bike
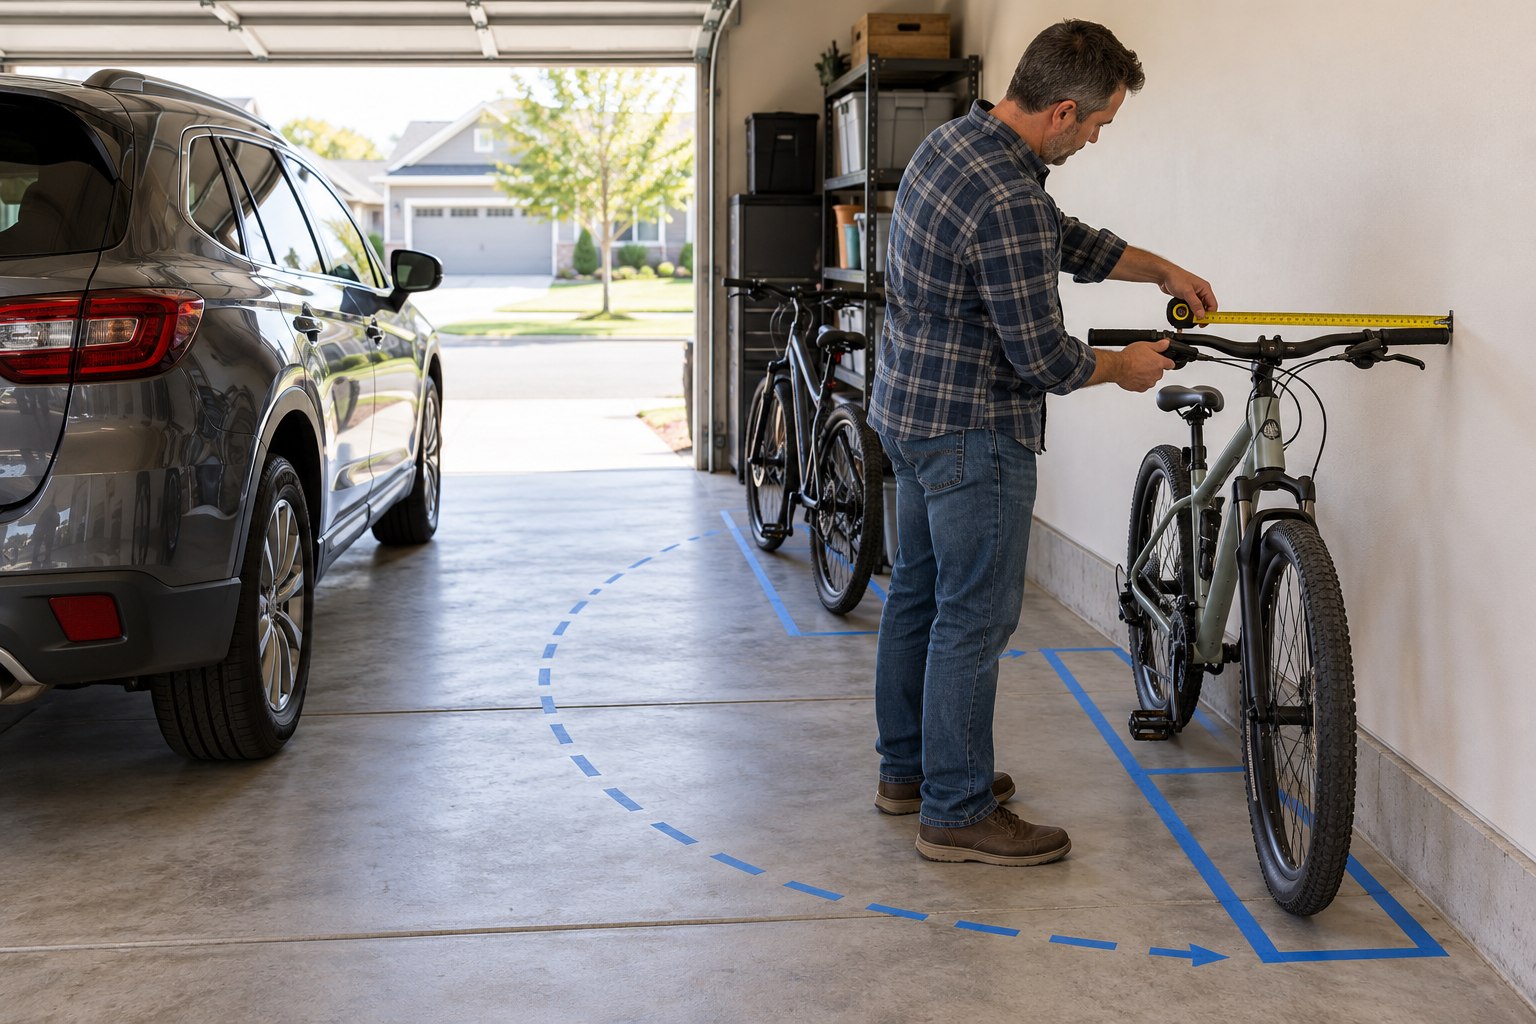
Do not measure an empty garage and assume the remaining space is available. Park the vehicle in its normal position, open every garage and house door, and move the vehicle hatch, doors, and mirrors through the positions used at home.
Measure each bicycle as it will be stored. Useful dimensions include overall length, handlebar width, pedal depth, wheel diameter, tire width, and height in the proposed orientation. Include baskets, child seats, fenders, pannier racks, and other accessories that stay on the bicycle.
Then mock up the storage and retrieval envelope with painter’s tape. Mark not only the resting position but also the arc needed to roll, rotate, lift, or pivot the bike into place.
If the bike zone competes with parking, use the protected-envelope method in Half Parking, Half Storage. If the garage still contains mixed piles, map the category first with How to Organize a Garage into Zones.
Compare the four main storage methods
| Method | Works best when | Main tradeoff |
|---|---|---|
| Vertical wall rack or hook | You need to fit several bikes into limited wall width | The bike projects into the room and the front wheel must be raised |
| Horizontal wall cradle | You have wall width and want one or two bikes at a controlled height | It uses a long section of wall and frame fit matters |
| Floor or freestanding rack | Access, flexibility, low lifting, or no drilling matters most | It keeps some bicycle footprint on the floor |
| Ceiling hook or hoist | The bike is used infrequently and a genuinely clear overhead zone exists | Retrieval and installation are more demanding |
There is no need to force every bicycle into the same system. A mixed setup often works better: daily bikes on the floor or a low wall rack, lighter weekly bikes vertically, and a seasonal bike in the least convenient safe position.
Vertical wall storage
Vertical storage usually holds the bicycle perpendicular to the wall by the wheel, tire, or a purpose-built tray and support. It can fit several bikes along a wall because each bicycle uses less wall width than a horizontal cradle.
The apparent wall efficiency does not eliminate room depth. Handlebars, pedals, baskets, and the body of the bike extend into the garage. Pivoting racks can reduce that depth after the bike is loaded, but their swing area must remain clear.
Check the exact rack for wheel diameter, tire width, fender clearance, bicycle weight, and required wall construction. Current rack families often offer different versions for road, mountain, fat-tire, and fender-equipped bikes. Those versions should not be treated as interchangeable.
Vertical storage is a strong candidate for multiple adult bikes when users can control the lift. It is a poor position for a bike that is too heavy for the regular user or for a child expected to retrieve it without help.
Horizontal wall storage
A horizontal cradle holds the bicycle parallel to the wall, usually at the frame. This can keep the bicycle lower than a vertical hook and can turn a single bike into an orderly wall display.
The tradeoff is wall width. One adult bicycle can occupy most of a usable wall section, and the handlebar still determines how far it projects into the room. Two bikes may need staggered heights to avoid handlebar, pedal, and cable contact.
Frame shape matters. Sloping top tubes, full-suspension layouts, step-through frames, and large accessories may not sit correctly on fixed cradle arms. Choose a rack whose manufacturer documents the relevant frame and weight compatibility. Soft contact pads can help protect finishes, but they do not correct an incompatible support position.
Floor and freestanding storage
Floor racks are often the best daily-use choice because the bike rolls into place. They work well for children, renters, users who cannot lift a bike, and heavy e-bikes. They also make it easier to change the layout later.
The cost is floor area. A row of bikes can spread across a parking bay if handlebars overlap poorly or if every bike must back out through the same aisle. Test whether each bike can leave independently while the car is present.
Freestanding vertical trees, leaning racks, and floor-to-ceiling tension systems can move storage upward without conventional wall drilling. They still have model-specific weight, ceiling, stability, assembly, and anti-tip requirements. A no-drill product is not automatically safe on every floor or around children.
Ceiling and hoist storage
Ceiling hooks and pulley hoists can remove a bicycle from both the floor and the wall. That benefit is real only when the full overhead path is clear and the rider can operate the system safely.
Check the garage door, tracks, opener, lights, attic access, utilities, vehicle roof, raised hatch, walking path, and the space needed to raise and lower the bike. The exact mounting structure and product instructions control the installation. Drywall alone is not a structural mounting point.
Ceiling storage usually fits an infrequently used bicycle better than a daily commuter. If the bike is positioned above a vehicle or a path people use, the consequence of poor installation or incomplete retention is greater. Use the clearance and structure framework in Ceiling Storage before considering this method.
Plan storage for multiple bikes
Design around the complete household fleet, not an average bike. A practical sequence is:
- Give daily riders the easiest independent positions.
- Place children’s and heavy bikes at ground level.
- Group compatible lighter bikes on wall systems.
- Stagger heights only after checking handlebars, pedals, brake levers, and derailleurs.
- Keep helmets, locks, pumps, and shoes close without blocking the bike supports.
- Test the arrangement for one week with floor and wall tape before drilling.
Alternating the direction of adjacent bikes may reduce handlebar conflicts, but it can also make one bike harder to retrieve. A high-capacity rack is not useful if the middle bicycle cannot leave without unloading the entire row.
Check e-bikes, fat bikes, fenders, kids’ bikes, and hydraulic brakes
E-bikes
E-bikes can be substantially heavier than unpowered bicycles. Ground-level or roll-in storage is usually the practical starting point. If the battery is removable, removing it may reduce lifting weight, but follow the bicycle and battery manuals. Confirm both the rack capacity and the user’s ability to control the bicycle during loading.
Fat tires, fenders, and small wheels
Wheel-contact racks commonly specify tire-width and wheel-diameter ranges. Fenders can interfere with arms that approach the tire from behind. Children’s wheels may be too small for a rack designed around adult bikes. Match each bike to the current manufacturer chart rather than relying on a general product category.
Unusual and full-suspension frames
Horizontal cradles need appropriate support points. Step-through, sloping, aero, carbon, and full-suspension frames may require adjustable arms or a different storage method. Follow the bicycle and rack manufacturers’ contact-point guidance.
Hydraulic brakes
If a bike has been stored upside down or on its side, follow the exact brake manufacturer’s instructions before riding. Shimano hydraulic-disc-brake documentation, for example, requires operating and checking the brake levers after the bicycle has been inverted or placed on its side. If braking does not feel normal, do not ride until the system has been addressed according to the manual or by a qualified bicycle professional.
Keep e-bike battery storage separate from rack choice
A rack organizes the bicycle. It does not make an unsuitable battery charging location safe.
- Use the battery and charger specified by the manufacturer.
- Follow the exact temperature and long-term charge guidance for that battery.
- Keep charging away from exits and materials that can burn.
- Do not charge while sleeping or leave charging unattended when the manufacturer or public-safety guidance advises against it.
- Stop using a battery that becomes unusually hot, swells, leaks, smells unusual, changes color, smokes, or behaves abnormally.
- Follow manufacturer and local guidance for a damaged or recalled battery. Do not place it in household trash.
The National Fire Protection Association and the U.S. Consumer Product Safety Commission both emphasize compatible charging equipment, manufacturer instructions, and careful response to abnormal batteries.
Install, load, and test the complete movement
Follow the exact rack instructions for the mounting surface, hardware, spacing, capacity, assembly, and retention features. Do not transfer fastener or capacity information from a similar-looking rack.
After installation, load one bicycle at a time. Check every contact point and retention device. Move the bike into and out of storage slowly while another adult watches the vehicle, doors, wall, nearby bikes, and the user. Recheck all required hardware after the initial use interval stated by the manufacturer.
Finally, run the real garage routine: park the vehicle, open the house door, operate the garage door, retrieve the most-used bike, return it, and walk through the space carrying normal gear. If any step requires an awkward twist, uncontrolled lift, or moving several unrelated items, revise the layout.
Safety boundaries
- Do not mount a loaded bike rack to unsupported drywall.
- Do not use a capacity claim without confirming the exact model and installation conditions.
- Do not position a bike where it can fall into a vehicle, exit path, appliance, electrical panel, or active work area.
- Do not ask a child or another user to lift a bike they cannot control.
- Do not assume one hook or cradle is compatible with every tire, wheel, frame, or accessory.
- Do not drill where hidden electrical, plumbing, gas, structural, or garage-door components may be present.
- Use a qualified installer or bicycle professional when the structure, installation, bicycle contact point, or component behavior is uncertain.
Common questions
Is it okay to hang a bike by its wheel?
It can be appropriate when both the bicycle and the exact rack manufacturer allow that contact method and the hook fits the wheel and tire. Check wheel material, tire width, fenders, bike weight, and the rack instructions instead of assuming every wheel is suitable.
Is vertical or horizontal bike storage better?
Vertical storage usually saves wall width and works well for several bikes. Horizontal storage uses more wall width but may keep one or two bikes lower and easier to display. The better choice depends on lifting ability, bike geometry, handlebar depth, wall size, and retrieval frequency.
What is the easiest garage bike storage for daily use?
A stable floor rack or another roll-in position is usually the lowest-effort option because the bicycle does not need to be lifted. A low wall system can also work when the regular user can comfortably control the bike.
Should an e-bike be hung on a wall?
Only when the exact rack, mounting, and bicycle are compatible and the user can safely load the full weight. Because e-bikes are heavy, a ground-level or roll-in rack is usually the practical starting point.
Can hydraulic-brake bikes be stored upside down?
Follow the exact brake manufacturer’s instructions. Some hydraulic systems require a brake-function check after a bicycle has been upside down or on its side. If the lever feels abnormal, do not ride until the issue is addressed correctly.
How do I fit several bikes beside a parked car?
Park the car first, measure handlebars and pedals, protect the vehicle-door and walking envelope, and tape out both the stored position and retrieval path. Give daily and heavy bikes independent low positions, then use higher wall positions only for compatible lighter bikes.
Sources reviewed
- Park Tool, Storage Hook
- Steadyrack, Choosing the Correct Bike Rack
- Feedback Sports, Velo Wall Rack
- Shimano, Hydraulic Disc Brake Dealer’s Manual
- Trek and Electra, Electric Bike Maintenance
- National Fire Protection Association, Safety with E-Bikes and E-Scooters
- U.S. Consumer Product Safety Commission, E-bike Battery Safety Warning