Choose your garage wall system by the items you reach for, the accessories that hold them, and the wall you can safely mount to. Pegboard can make a compact hand-tool collection easy to see. Slatwall can organize a broader mix of hooks, baskets, and shelves. Neither name alone tells you how much weight the finished installation can support.
The useful comparison is between two complete systems for your actual inventory. Include the panel, mounting hardware, accessories, occupied depth, and retrieval space before deciding which one earns a place in your garage.
Short answer
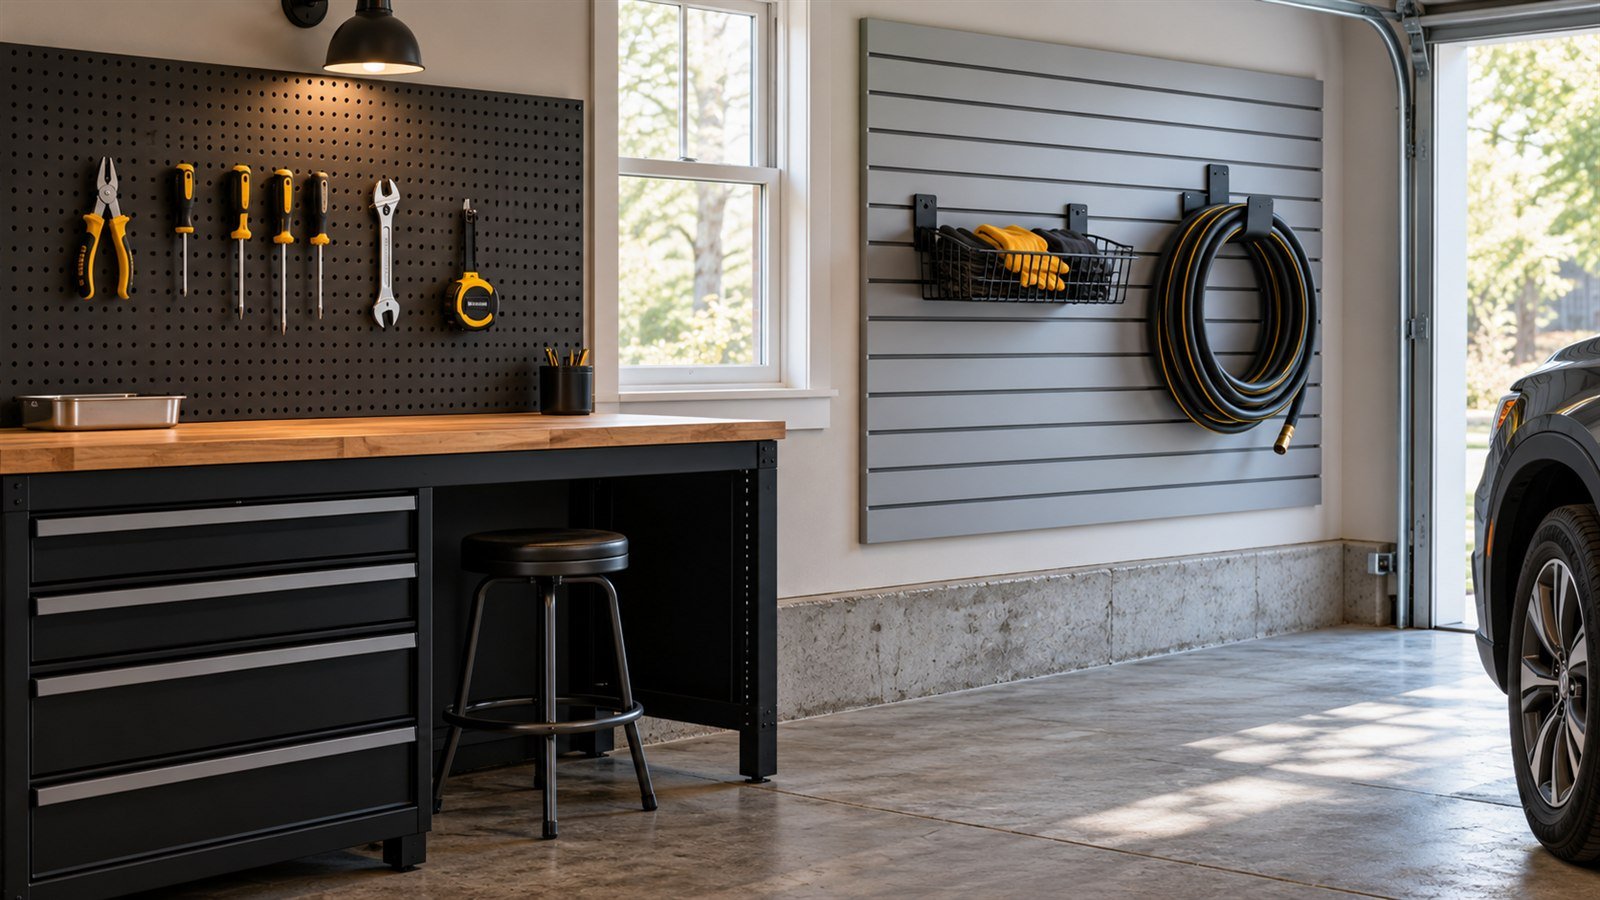
Start with pegboard for a compact wall of frequently used hand tools. Consider slatwall for mixed garage gear that needs baskets, deeper hooks, or shelves. Use both when those jobs occupy different zones. Then verify the exact panel, hook fit, accessory ratings, mounting instructions, and garage conditions.
A small hardboard pegboard project may be a sensible starting point when its complete installed cost fits your budget. Metal pegboard is a separate comparison, with different mounting details and accessories. Slatwall also varies by material and profile. Do not treat all pegboard as fragile or all slatwall as suitable for heavy loads.
Pegboard vs slatwall at a glance
Use this table to narrow the layout, then check the exact systems you are considering. It describes organizing patterns, not a universal performance ranking.
| Decision | Pegboard | Slatwall |
|---|---|---|
| Useful starting job | A visible hand-tool station above or beside a bench | A mixed-gear zone with hooks, baskets, and shelves |
| Accessory position | A hole or slot pattern controls where hooks fit | Horizontal grooves control accessory placement |
| Compatibility check | Hole size, spacing, board thickness, slot design, and hook retention | Groove profile, accessory engagement, and any locking mechanism |
| Mounting check | Rear hook clearance, support spacing, fasteners, and substrate | Stud or backing requirements, fastening pattern, panel joints, and trim |
| Capacity check | Exact panel, hook, mounting, and load-position limits | Exact panel, accessory, mounting, and load-position limits |
| Cost comparison | Panel plus spacers or frame, hardware, hooks, and finishing | Panels plus trim, hardware, hooks, baskets, and shelves |
| Main layout risk | Crowded tools that snag each other or lift their hooks | Deep accessories that occupy parking or walking space |
Start with the items, not the empty wall
Lay out the items you intend to hang and group them by use. A repair station might need pliers, screwdrivers, a tape measure, and a few wrenches. A household gear wall might need gloves, a hose, and a basket of sports equipment. These are different accessory lists even if they need the same panel area.
- Small tools: measure their shapes and leave room to grip each handle.
- Bulky items: measure their full projection and the movement needed to remove them.
- Heavy items: record the loaded weight and confirm a documented accessory and mounting arrangement.
- Loose parts: decide whether shallow bins or drawers would work better than individual hooks.
- Occasional gear: consider whether it deserves prime wall space near the bench.
For each group, choose a garage zone and write down the accessory it needs. If you are still deciding where categories belong, start with garage storage zones. Wall panels are one part of that plan.
When pegboard makes sense
Pegboard is a useful candidate when you want to see a small tool collection at once and return each item to a clear position. A compact panel near the workbench can keep routine tools within reach while leaving the bench surface available for work.
The hole or slot pattern gives you repeatable positions, but an open hole is not necessarily a usable position. A large tool may cover several neighboring holes. A furring strip behind the board can also prevent a hook from engaging at that location. Plan the arrangement around the installed supports and the tool handles.
Check retention as well as fit. A hook that comes out with the screwdriver slows every retrieval and may drop nearby items. Use the system’s specified retaining clips or locking accessories where appropriate. Test one representative hook with the actual board thickness before buying a large assortment.
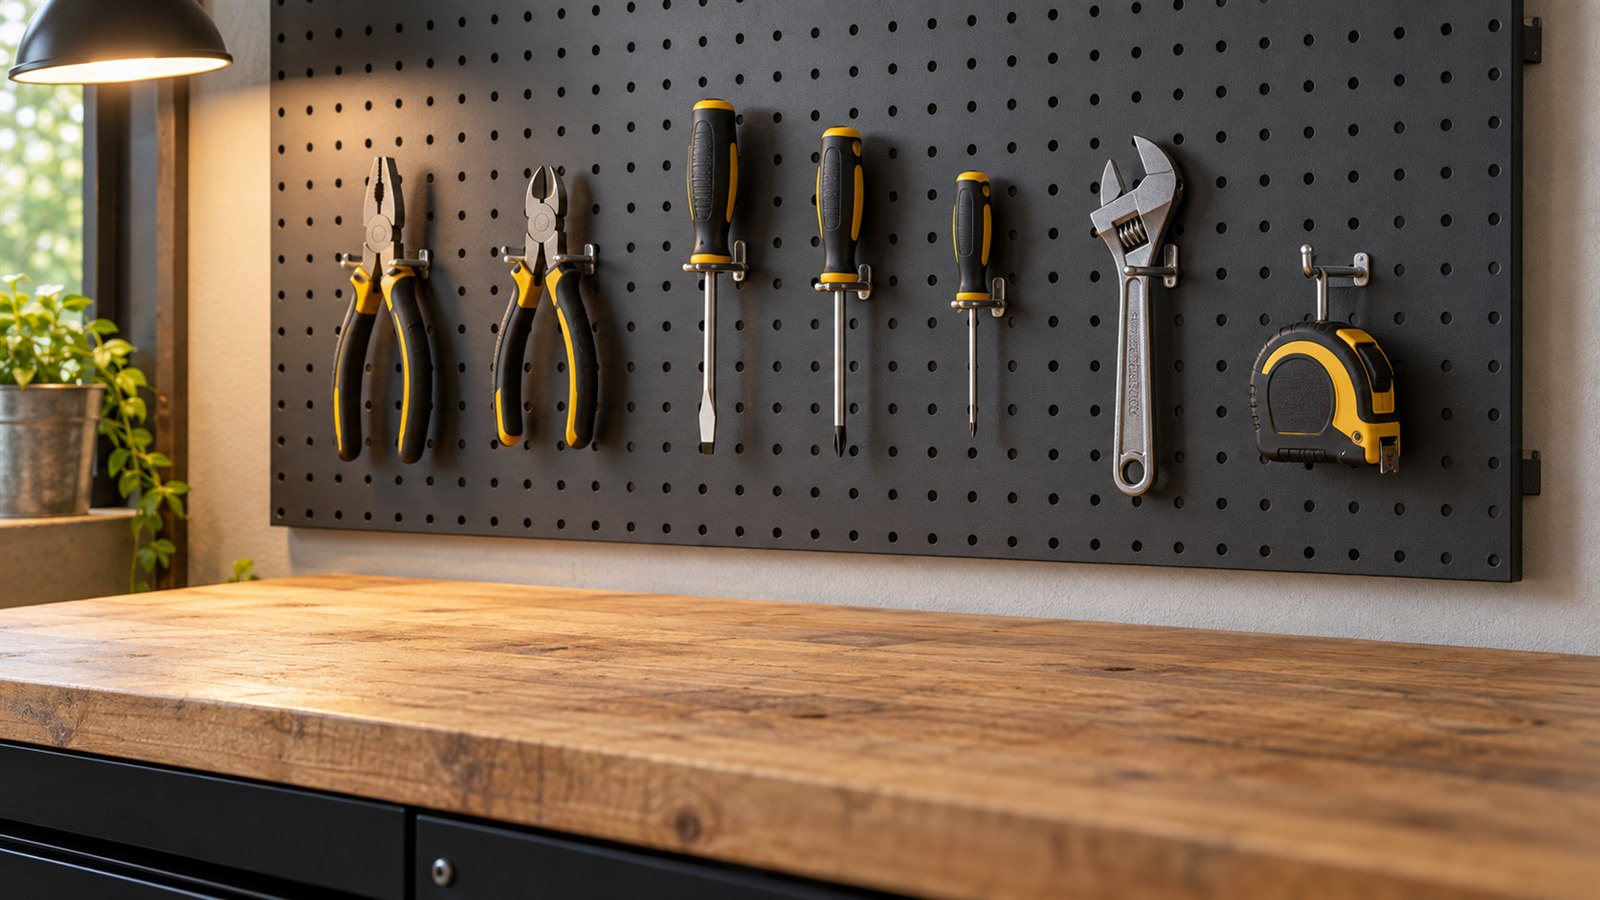
Keep the daily tools in a comfortable reach zone for the people who use them. Very small parts may be easier to manage in a shallow drawer or divided box. A pegboard filled edge to edge can be visually tidy while making retrieval awkward.
When slatwall makes sense
Consider slatwall when the inventory needs a mixture of hanging and container storage. A basket can group gloves; a broad hook can hold a hose; a shelf can support a suitable case. The horizontal grooves give you a way to change the arrangement within the panel area.
The practical advantage depends on the accessories available for the exact profile. Count the hooks, baskets, and shelves you need and confirm their dimensions before choosing a panel package. A wall kit with many general hooks may still lack the holders your actual items require.
Do not choose slatwall on the assumption that it accepts every slatwall accessory. Proslat’s FAQ, for example, specifies its own hooks and accessories for its panels. It also says its different panel categories do not interlock with one another. Those are system-specific constraints, not rules for every brand.
A long wall of matching panels can create a consistent appearance, but start with the useful zone. Covering more wall adds cost without necessarily adding access. Leave expansion room where future accessories can serve a known need.
Compare the materials as well as the pattern
Pegboard describes the organizing surface, not one material. Traditional hardboard and formed metal panels need separate checks. Slatwall likewise comes in different material constructions and groove designs. The finish you see in a photograph does not establish humidity tolerance, corrosion resistance, or capacity.
For a garage that gets damp, first identify and correct the moisture source. Check the exact panel’s installation and environmental limits. Hardboard finishing guidance does not turn it into a waterproof panel, and a corrosion-resistant finish does not make every metal edge or accessory immune to damage.
Read any restrictions on temperature, sunlight, cleaning products, and exposure. Choose accessories that tolerate the same conditions as the panel. Do not assume a garage wall surface is approved for outdoor use just because it can be wiped clean.
Check accessory fit before buying a full kit
Write down the exact panel family and the exact accessories. Verify the manufacturer’s compatibility statement rather than relying on a similar appearance or the word universal on an unrelated listing.
Wall Control’s FAQ gives a useful example: many of its combo panels accept traditional quarter-inch peg hooks as well as its slotted accessories, but it also warns that round hooks vary and some fit poorly. Nominal size alone does not establish a secure match.
- Confirm the hole or groove geometry and required panel thickness.
- Check how the accessory seats, locks, and releases.
- Verify the accessory’s own rating and any mounting conditions.
- Confirm that the intended item fits the holder without an improvised attachment.
- Check that replacement accessories are available for the same panel family.
When compatibility remains unclear, ask the manufacturer about the exact pair. Do not bend a hook, remove a latch, or modify a panel to make an unsupported combination fit.
Read load ratings in their full context
A panel rating, a per-hook rating, and a shelf rating answer different questions. A distributed rating for a wall area is not permission to place the same load on one accessory. A long hook or deep shelf also changes how far the load projects from the wall.
Evaluate the whole path: stored item, accessory, panel connection, panel, fasteners, and supporting wall. Keep within every applicable limit and configuration requirement. If documentation does not cover the arrangement you want, obtain guidance for that arrangement rather than multiplying an advertised number by the panel area.
Keep heavy or awkward items where they can be controlled during retrieval. Choose a purpose-designed holder for items such as bicycles, and follow the item and holder instructions. For those decisions, see the bike storage guide. Neither a generated photo nor a visually similar installation is evidence of a safe load.
Plan the wall and installation before ordering
Identify the wall construction, available mounting positions, and any obstacles before buying panels. Drywall, exposed framing, and masonry require different arrangements. Follow the exact system’s instructions for supports, fasteners, spacing, panel joints, and trim.
Traditional pegboard commonly needs a gap behind the panel for hook engagement; The Home Depot’s installation guide illustrates a furring-strip approach. Some formed metal panels provide their own rear clearance. Do not add a generic spacer dimension to every product or mount a board flush if its hooks require clearance.
For slatwall, check the specified support layout and fastening pattern for the exact panel family. Confirm whether your wall needs additional backing and whether the panel edges must land at specified support points. A package’s included screws may not suit every substrate.
Locate concealed services before drilling. Keep doors, garage-door hardware, outlets, controls, and required access to utilities clear. If the wall’s structure, concealed services, or garage separation requirements are uncertain, have a qualified professional determine the installation approach. This comparison is not a structural design or a substitute for the installation manual.
Measure the loaded depth and retrieval space
Measure from the finished wall to the furthest point of the installed accessory and stored item. Include panel depth, spacers, hook projection, basket depth, and the actual gear. Then allow the movement needed to lift, tilt, or pull the item free.
Test the proposed positions with the vehicle parked normally and its doors open. Check the path from the house door to the garage door and the working space around the bench. A basket that fits while the garage is empty may obstruct access on an ordinary weekday.

Mark the proposed outline temporarily before committing to a larger system. For parking and storage layout decisions, use Half Parking, Half Storage. There is no single aisle measurement that fits every vehicle, household, and required clearance.
Compare complete installed cost
Price the same inventory and useful wall area for each option. Include panels, rear supports or spacers, trim, substrate-specific hardware, finishing, the exact accessories, delivery, and any installation help. Separate included pieces from the pieces you will need to add.
Then ask what you would need for one realistic expansion. A cheaper panel can be poor value if the right accessories are unavailable. A larger bundle can cost more while leaving many unused hooks. Current prices and promotions change, so this guide does not assign a universal price winner.
A practical first purchase is a small, complete zone that you can use immediately. After using it for normal tasks, adjust the layout before covering the rest of the wall. Pegboard near a bench and slatwall in a household gear zone may be more useful than choosing one system for every wall.
Final buying checklist
- The inventory and intended garage zone are written down.
- Every item has a suitable, documented accessory.
- The exact panel and accessory compatibility is confirmed.
- Panel, accessory, and installation limits cover the intended arrangement.
- The supporting wall and fasteners match the installation instructions.
- Loaded depth and retrieval movements fit with the vehicle and doors in use.
- Environmental limits suit the actual garage conditions.
- The quote includes hardware, supports, trim, finishing, and the required accessories.
- Replacement accessories and a realistic expansion route are available.
Choose the smallest complete system that does the job comfortably. Expand after the arrangement works in daily use.
Common questions
Is pegboard or slatwall better for a garage?
Pegboard is a useful starting point for a compact hand-tool station. Slatwall is worth considering for mixed gear that needs hooks, baskets, and shelves. The better choice depends on the exact accessories, installation, loaded depth, and complete cost for your inventory.
Is slatwall always stronger than pegboard?
No. The names do not establish a universal capacity ranking. Compare the exact panel material, accessory rating, mounting arrangement, support spacing, and load position. A distributed panel rating is not the rating of an individual hook.
Do all pegboard hooks fit every pegboard?
No. Hole diameter, spacing, panel thickness, slot design, and retention details can differ. Confirm compatibility for the exact panel and hook, and test a representative combination before buying a large set.
Can I use one brand’s hooks on another brand’s slatwall?
Only when the manufacturers’ documentation supports that exact combination. Similar-looking grooves do not prove a secure fit or preserve the stated capacity. Verify the profile, engagement, locking mechanism, and applicable ratings.
Can pegboard be mounted directly against drywall?
Only if the exact system’s mounting design permits it and its hooks have the required rear clearance. Traditional pegboard commonly uses furring strips or spacers. Some formed metal panels provide built-in clearance. Follow the specific panel’s instructions.
Can I use pegboard and slatwall together?
Yes, as separate systems serving separate jobs. A pegboard tool station and a slatwall gear zone can share one garage. Plan each installation and accessory set independently; the panels and hooks do not need to interconnect.
Sources reviewed
Research reviewed October 2, 2026. This is a category decision guide based on editorial research, not a hands-on product test. Manufacturer examples illustrate specific compatibility and installation differences; they are not product endorsements or a universal capacity comparison.
- Wall Control: pegboard installation and accessory FAQ
- Proslat: slatwall compatibility and panel-family FAQ
- The Home Depot: How to Hang a Pegboard
Check the current instructions for the exact products and wall before installation. The images are illustrations and do not document a tested product, installation, or load.